Thursday, February 25, 2016

Explosion Card

This may look like an ordinary card...until you open it...

Isn't this a fun treat! Just love explosion cards.
I  used Karen Titus' video tutorial to make this "oldie but goodie".
She shares a little story to help remember how to make the folds
on the 8 inch square of printing paper.
I enjoyed using an old favorite stamp set
Stampin' Up!'s  Fresh Flowers from 2001.
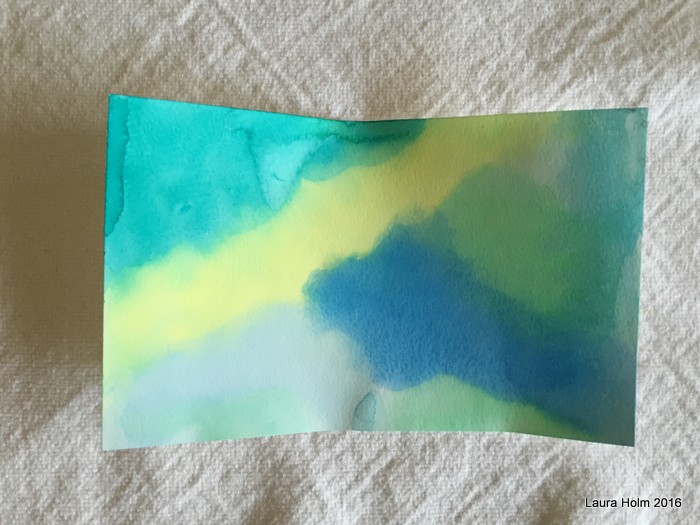
Inks
Distress:  pickled raspberry, mermaid lagoon, dusty concord, mustard seed, twisted citron, tea dye
Stampin' Up: orchid opulence, marvelous magenta
Versafine black onyx

Stamps: Stampin' Up, Hero Arts.

Thanks for visiting!

Wednesday, February 24, 2016

2016 Winter Challenge Card

This is my card for the 2016 Winter Challenge at the Michael Strong Yahoo Group.
Mike shared the tree sketch on his blog.
The assignment was to incorporate his tree image into our design.
After saving the image, I opened it in photoshop elements.
I duplicated the tree and made 2 more smaller ones.
I printed the trees with my laser printer, 
using printer paper because my cardstock would not run through this printer.
I would have tried my inkjet printer, but I had trouble connecting my laptop to that!

Using home made "hill" templates, I sponged wild honey for my hills.
Punched a circle in a post it. Used the negative punch and sponged scattered straw for the sun.
Placed the circle post it over the sun, I sponged the sky with tumbled glass.

The sentiment, from Stampscapes, was stamped in Versafine black onyx.

Used Victoria Cuttlebug embossing folder for the top layer of my card.
Used a black frame around my layers, and burlap underneath the sentiment.

Thanks so much for visiting!

Tuesday, February 23, 2016

Watercolor Background

A friend asked me about my recent watercolor background so I decided to make a tutorial

I'm using a set of  used 28 watercolor "cakes" that my friend, Lynette gave me.
I think they are made by Simbalion.
I used a brush from my stash.

I wet my brush with water and swish it on the color cake to fill my brush with rich color!

Then I paint the colors in sections.
I'm using a "watercolor textured" paper that was given to me.
I don't know the weight or brand. It is about 4.5" high and 7.5" wide.


You can see from the photos that I just just keep adding colors.
The paper curls. It's ok if the colors run together. Makes things interesting!
Normally I let the paint air dry, but I was in a hurry to finish the card, so I used my heat tool. 

Here is the dried paper photographed in daylight, showing more accurate color.
The previous photos were taken with fluorescent light giving a blue cast.

I used half of my watercolor paper for my card. 
Roughened the edges with a distress tool.

Here is the inside, with a layer of thinner cardstock.
with a Fiskars edge punch.

Materials
Stamps: Hero Arts, Michael Strong, PrintWorks, Tim Holtz

Inks: distress peacock feathers, broken china, squeezed lemonade
Stampin Up orchid opulence, lavender lace
Versafine black onyx 

Fun fur fiber, gemstones, dimensional foam tape

Wednesday, February 17, 2016

Ninja Turtle Hats

I am "into" Ninja Turtles...well, actually Ninja Turtle Hats! My younger daughter used to love the Ninja turtles. Making these hats has brought back sweet memories!

Used Alli's Toddler earflap hat, without making the earflaps, for this green and blue Leonardo hat. It's for our neighbor, Brandon. I used post stitches in the last 2 rows.
The pattern for these eyes are from Jennifer Reaves Knottz of Yarn blog
My neighbor shared this link with me. Jennifer also has a hat/beanie pattern. I used Alli's hat patterns because I was more familiar with them and she had more size variations. 

The pattern for the eyes in the orange section above are from Monica's Chucks For Chancho blog.
Monica has a great method for changing colors, with a great photo tutorial. 
Used Alli's 6 month baby earflap hat for this green and orange hat, except without the earflaps.

Here is our little grandson, Gavin, wearing his Leonardo hat. 
I tend to make things too large, as you can see. 
Maybe I should rip out a row?

Thanks so much for visiting!
Peace and all good!

Saturday, February 13, 2016

2016 Valentines

After learning how to dry emboss the front flap of a card, I just had to make these Valentines. For the top fold cards, the card front is placed sideways in the embossing folder to emboss just the top 3/4 of the front of the card. For the traditional side fold card, the whole front is embossed. I used Cuttlebug folders: Heart Blocks and Victoria. I think I like the Victoria embossing better. At the bottom, I punched borders from Martha Stewart-Scroll Heart and Fiskars-scalloped edge using printed papers. Stamps used: Michael Strong, Hero Arts and unknown. Also used some punched and stamped scraps from my stash.