Showing posts with label baby. Show all posts

Tuesday, January 21, 2020

Wreath Cards

I am still making these wreath cards and having fun with them. Trying out variations with different stamps. Was happy to find great wreath stamps in the Stampin' Up's Lots of Lavender set!

Thanks to Lynette who loaned me 8 stamps sets for the winter!

Made my own template by drawing two 3-1/2 inch squares on paper. Placed that paper in my Misti.
Cut a 3-1/2 inch square of cardstock for stamping. Used that in the Misti, turning it 4 times. More details about the Misti placement at the end of this post.

Stamps: Stampin' Up! Lots of Lavender, All-Seasons Wreath; Hero Arts.
Ink: distress evergreen bough, worn lipstick, festive berries, oxide worn lipstick.
Colored pencil to color in the bow which was fussy cut and attached with foam tape

Same stamps and inks as above, except for Stampabilities sentiment. Also, added the tiny hearts from SU's Yay You set.
Used Cuttlebug Snowflakes embossing folder.

Stamps: Stampin' Up! What I love, Yay You.
Was happy to find that "cherish" stamp in SU's Baroque Motifs set.


This wreath was made free hand with Stampin' Up!'s wood stamp set, All-Seasons Wreath.
I still love the look of this wreath and love how easy it is to create.
Sentiment is from Hero Arts Everyday Sayings CL342.
Inks: distress frayed burlap, oxide worn lipstick
Colored pencil to fill in flowers and bow.

Here's a new baby card. Used a clear heart stamp in the Misti with oxide worn lipstick ink. I added the green sprigs  by hand using SU's All-Seasons Wreath wood set and distress evergreen bough ink. Used Cuttlebug's Heart Blocks embossing folder.

I took these photos to show how I stamped with the Misti. You can always click on images to see a larger view. I drew a 3-1/2: square (the size of my cardstock). Then drew another one at an angle as shown. Decided on placement using a circle and then added the heart stamp.
I was inspired by Jo-Anne Roger's video tutorial.

Since making these cards,  I treated myself to Gina K's Wreath Builder Bundle which comes with 2 templates and her Wreath Builder stamps. Stay tuned for more wreaths!

Hoping the new year is good to you all!
Peace and all good!

Saturday, March 24, 2018

Crochet for Baby Girl

My friend's daughter is having her first baby in May.
Here are some gifts I crocheted for the baby girl.
Baby blanket (and all the items shown here) are made from Caron Simply Soft yarn.

 Close up of the baby blanket

Sweater made with Aunt Jen Sweater pattern from Sandi Angels.
Apparently the Sandi Angels site is no longer available
but Ravelry had the link from web archive.

I started with  Alli's Crochet Hats patterns and then made some adaptations.
For this hat, added the open work and the scalloped edge.

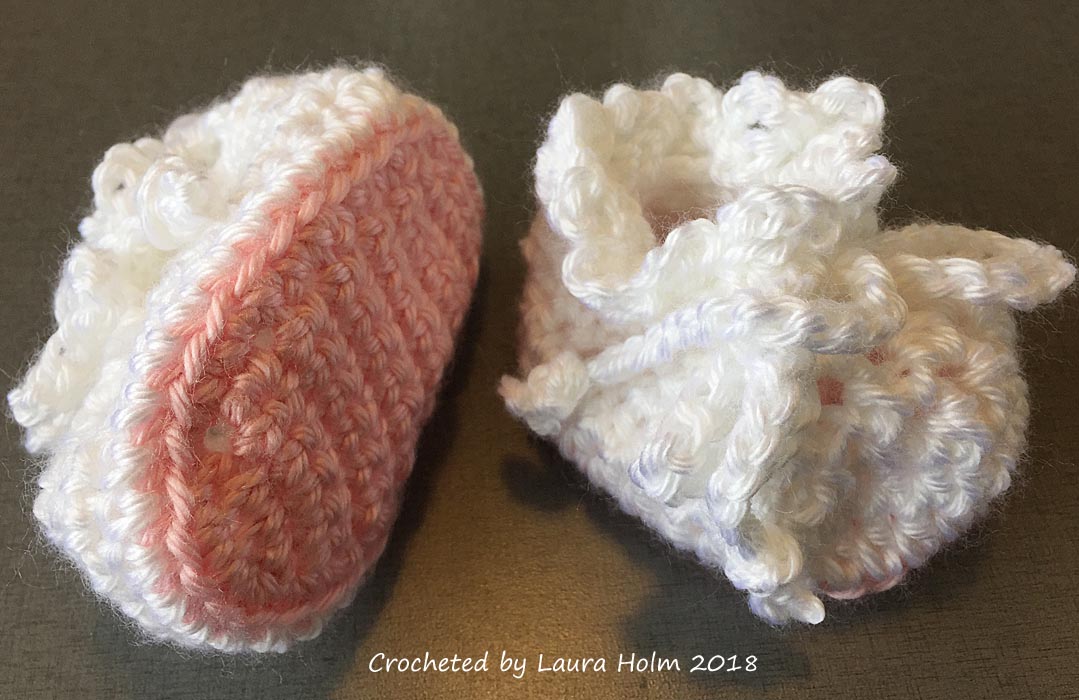
Since baby is due in May, I wanted the booties to be more open.
Began with Earth Baby's Bootie
adapting it by adding a back and tie to help booties stay on.

Flower pattern is from Nichole Heady.
Used Internet Archive to search for Nichole's old blog post and found it here:
Nichole's Crochet Flower


Added a cuff to this hat.

Thank you for visiting!

Wednesday, November 23, 2016

Newborn Baby Gowns

I'm sewing baby gowns again! My daughter Emily is expecting a baby girl in January 2017. She liked the newborn gowns I made for Gavin. They are nice when changing baby in the middle of the night!
I used Rachel's Overlap Shoulder Newborn Gown pattern that she so generously shared on her blog, Stitched Together.


I used the Stretch n Sew "chanel trim" method for the neckline.


 I cut the 2 strips in Rachel's pattern a little wider, 1.75" wide (instead of the 1.5 inch).
Pinned the strip to the RIGHT side, folded it to the wrong side, 
pinned itthen "stitched in the ditch" from the RIGHT side
removing pins before sewing.
It is very easy and looks nice, I think.
 
Thanks again, to Rachel at Stitched Together for sharing her expertise and pattern for this quick and easy gown pattern!

You can see the gown I made for Baby Gavin here.

Tuesday, March 22, 2016

Cloth Baby Books

I made these cloth books for 2 special little boys, our grandson, Gavin and a friend's son, Henry!
Using a 9 inch square piece of paper for my pattern, I cut 2 squares from 5 different fabrics using a quarter yard (9 inches) of each fabric. This was enough to make 2 books.
In order to get the same fabric on the left and right pages at once,
you have to figure out which pieces go where.

I place my pieces as if it were in book form, pinning so I can double check to see that the pieces will come where I want.  It's a bit mind boggling to me.  I sew 2 corresponding 9" pieces together using about 3/8 inch seam allowance.

Then lay 2 pages, right side together with batting on the bottom. I didn't take a photo of this. Sew all around the edges, with approximately 3/8 inch seam allowance, leaving an opening to turn. I trim the corners, serge the edges, except where the opening it. Turn right side out. Press and topstitch all around, carefully securing the opening.
Here you can see the "pages" which have been sewn.
Match up the cover and 1st page. Topstitch in the center.
Add the 3rd page and topstitch again, slowly and carefully. I only broke 1 sewing machine needle!

Tuesday, August 25, 2015

Crocheted Striped Baby Sweater


Made this crocheted sweater using
Simone Jaeger’s instructions on her 
My hood came out too big, so I made a collar instead.
Made the 3-6 month size with Red Heart Soft yarn and a size H (5.00 mm) crochet hook.

Friday, April 24, 2015

Overlap Shoulder Newborn Gown

I made an Overlap Shoulder Newborn Gown with a free pattern from Rachel at Stitched Together.
I think this was slightly faster than Virginia Lindsay's Gingercake gown pattern.
However, both are really quick, easy and fun to make.
I used left over print fabric for the front, and solid white fabric for the back.
We have to wait to see which neckline is preferred by the mommy and daddy, when baby arrives.
We are jumping each time the phone rings. What a joyful time!!!

I used the old Stretch n Sew "chanel trim" method for the neckline.
Sewed the 1.5 inch wide strip to the RIGHT side,
folded it to the wrong side, pinned it
then "stitched in the ditch" from the RIGHT side, removing pins before sewing.
It is very easy and looks nice, I think.

a closer view

See the inside part of the gown where the trim has been folded over.
This stitching is done from the other side...the right side.

 This is the front. You can see faint stitching on the left. The stitching is done right in the seam line
hence, "stitch in the ditch".
The stitching line is barely visible.

When I sew seams in knit fabrics, I always stretch the fabric a bit.
Then I either stitch another row, half way to the edge of the fabric or serge the edge.
Most of the time I use a 1/4 inch seam allowance.
For the sleeve hem I pressed under the 1/2 inch hem before sewing the gown side seams.
You can sew the sleeve hem first, while the fabric is flat if you wish.
I like the more finished look of sewing the side seams first.
A GREAT BIG THANKS to
Rachel from Stitched Together and Virginia Lindsay from Gingercake
for so generously sharing their newborn gown patterns!

Wednesday, April 1, 2015

Newborn Baby Gown

Made this newborn baby gown
for Emily and John's baby boy who is due at the end of April.
We are soooo happy and and excited!!!
I found a great pattern and tutorial at Virginia Lindsay's Gingercake blog.
She has a free download and great photo instructions.
It was quick and easy to sew.

For a baby boy, I used a crew neck trim.
After the placket was sewn, I trimmed the neckline down about 1/2 inch.
 From cotton ribbing fabric I cut a piece 2-1/2" wide by about 9" long.
To finish the ends, I sewed a 1/4" seam on both ends,
turned to right side,  and pinned finished ends to the placket areas.
Then pinned the center back or the rib trim to the center back of the gown.

With the ribbing on top, I stretched the ribbing to fit and sewed with a 1/4" seam allowance.
Stitched a 2nd time in the seam allowance to reinforce. (or use serger)
This is the old Stretch & Sew technique I learned way back in the 1970s!

Just a note about the Dritz snap fastners that I bought. 
They now come with a blue plastic fastening tool. Wasn't sure I was going to like that. 
So, I dug out an old metal fastening tool in my sewing stash.
Used that with my small hammer and self healing mat while I watched 
Wendi Gratz's YouTube How to Use Hammer-On Snaps
Amazing how you can find patterns and tutorials online!
Thank you Virginia Lindsay & Wendi Gratz!

Tuesday, March 31, 2015

Diaper Burp Cloth

Here are the first three diaper burp cloths I made for Emily and John's soon to arrive baby boy!
I used Lauren's Burp Cloth Tutorial  from her blog, The Thinking Closet.
Really liked the way she overlapped the decorative fabric on the short ends of the diaper.
After preshrinking the Gerber prefolded diapers, I ironed them flat.
It is worth the trouble because you won't have puckers when you sew the decorative fabric on top.
Using some kids pattern fabric scraps from my stash, I cut strips 7 inches wide by 20 inches long.
Basically you want to measure your diaper and cut your fabric 1" wider and 2" longer
than the area you are covering.
Press a 1/2 inch hem around all edges.
Pin the fabric to the center of the diaper equally distributing the fabric.
The short ends will extend over the ends of the diaper.
Fold and pin one of those short ends. This is the first place you will sew.
Stitch close to the edge of decorative fabric.
Turn to the right side, where your strip of decorative fabric is centered on the diaper.
Sew one side, then the next, keeping the diaper and fabric taut and stitching close to edge of fabric.
Wrap the end of the decorative fabric around to the back.
Pin in place and stitch, and you are done!

Saturday, February 7, 2015

Dorky Bird Baby Card and Crocheted Sweater Set

Made this baby card to send with a baby sweater set that I crocheted for my friend's daughter
who is expecting a baby boy in April.
I just love the little dorky bird stamp made by Judith.

Here is my favorite crocheted baby sweater set that I like to make.

Sunday, May 25, 2014

Benjamin's Name Frame

Made a name frame for our newest member of the family, Don's nephew's son, Benjamin.
 
Without the frame.

In an 8 x 10 inch frame.

Here is the baby card. Started this at Lynette's house earlier this month.

Thursday, May 1, 2014

Name Frame for Baby Elise

Made this name frame for our friend's new baby.

I used to make these in long, narrow frames, but they are difficult to find. So I adapted my design to fit the frames that are easy to find. I think this is an 8 x 10 inch frame.

Below is the baby card. 

Monday, July 8, 2013

Elizabeth's Mini Photo Book and Caitlyn's Baptism Card

I made this mini photo book for Elizabeth's graduation from high school. This is my second mini book of this kind, both of them made using Hetty's tutorial. This time, I added an extra page to fit more photos in the book.

Here is the graduation card
 Along with the graduation party, we celebrated Baby Caitlyn's Baptism. Here is the baptism card.